
One of PowerShell’s greatest strengths is its ability to retrieve detailed information from the underlying operating system and produce comprehensive reports. Sometimes, however, you may find that you wish to save a copy of the data so that you can review it later. This is where PowerShell’s Out-File cmdlet comes into play.
How Does Out-File Work?
The Out-File cmdlet is extremely easy to use.
In most cases, the Out-File cmdlet is appended to either a PowerShell cmdlet or to a variable. Doing so makes it so that the output is written to a file rather than displayed on screen.
How To Use the Out-File Cmdlet
At its most basic, using the Out-File cmdlet requires you to provide a path and filename where the output should be written.
Suppose you wanted to create a list of the system services that are currently running on Windows, then write the list to a text file named C:\Scripts\Services.txt. You could accomplish this with the code below:
$Services = Get-Service | Where-Object {$_.Status -eq ‘Running’}

$Services | Out-file -FilePath ‘C:\Scripts\Services.txt’
As you can see, the list of running services was written to a variable named $Services. The contents of the variable were then piped to the Out-File cmdlet. The cmdlet’s -FilePath parameter was then used to tell PowerShell where to save the file and what to call it. You can see what the actual commands look like in Figure 1.
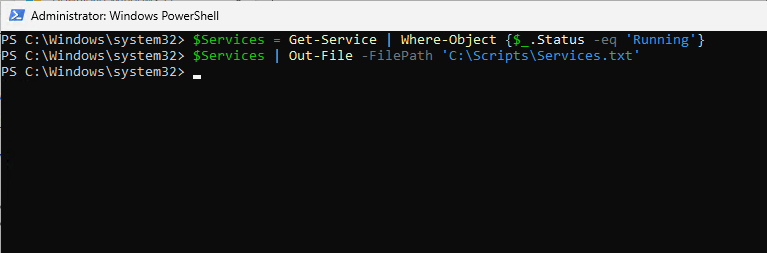
Figure 1. This is how you can write PowerShell output to a file.
How To Read a Text File
When you use the Out-File cmdlet to create a text file, you can open the resulting text file in Notepad or another text editor. You can also display the file contents within PowerShell.
When it comes to displaying a text file within PowerShell, I usually catch myself using the Type command. The Type command is a leftover from the days of DOS. It only requires you to provide the path and filename. So, for example, if you wanted to see the contents of the C:\Scripts\Services.txt file, you would enter:
Type C:\Scripts\Services.txt
Type is an alias for PowerShell’s Get-Content cmdlet, which works the same way. Just enter the Get-Content cmdlet along with the path and filename of the file that you want to display.
Here is an example:
Get-Content C:\Scripts\Services.txt
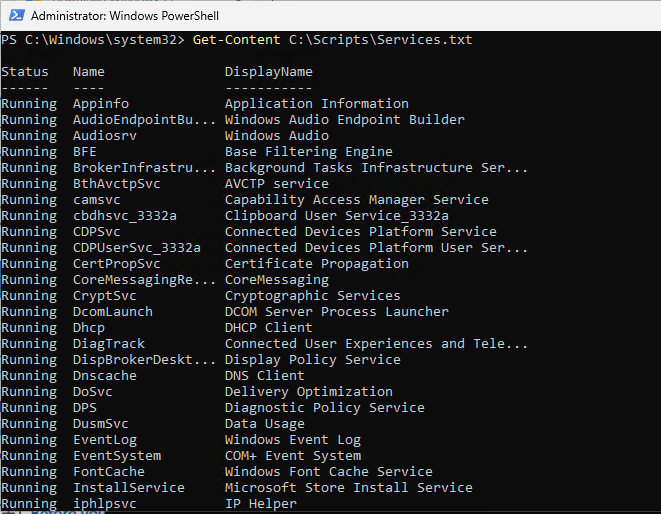
Figure 2. You can use the Get-Content cmdlet to display a text file’s contents.
How To Set the Encoding
When you use the Out-File cmdlet to create a text file, you normally don’t have to worry about specifying the encoding scheme. The default encoding typically works fine. However, you can set the encoding to ASCII if necessary, and you can even specify a line width.
Keep in mind that any excess characters on a line will be truncated. For example, if you set the line width to 80, then 81 characters or more would be truncated.
If you want to set the encoding to ASCII and you want to set a maximum line width, you will need to append the -Encoding and -Width parameters to the Out-File cmdlet.
Here is what such a command might look like:
$Services | Out-file -FilePath ‘C:\Scripts\Services.txt’ -Encoding ASCII -Width 80
How To Append Data
If you use the Out-File cmdlet and the specified file already exists, that file will usually be overwritten. It is possible, however, to append new data to the end of the file rather than overwrite the file. The key is to include the -Append parameter.
Here is an example of how the -Append parameter is used:
$Services | Out-file -FilePath ‘C:\Scripts\Services.txt’ -Append
How To Force Overwriting an Existing File
When you use PowerShell to create a text file, another problem can sometimes occur: You need to overwrite a file, but that file is being treated as read only. The workaround for this (assuming that the necessary permissions are in place) is to append the -Force parameter to the Out-File cmdlet.
Here is an example:
$Services | Out-file -FilePath ‘C:\Scripts\Services.txt’ -Force
How To Prevent a File From Being Overwritten
A text file that you have generated may contain important data that you want to ensure won’t be overwritten. The best way to prevent the overwriting of the text file is to append the -NoClobber parameter. The -NoClobber parameter causes the Out-File cmdlet to produce an error if the specified file already exists.
Here is an example:
$Services | Out-file -FilePath ‘C:\Scripts\Services.txt’ -NoClobber
You can see what this looks like in Figure 3.
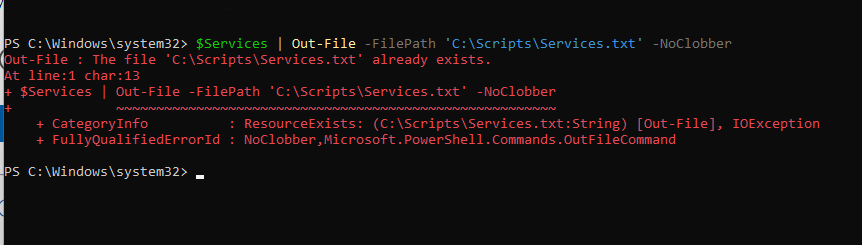
Figure 3. The NoClobber parameter prevents PowerShell from overwriting an existing file.


