
Organizations invest considerable time into creating and fine-tuning group policy objects, which involve configuring various settings to meet their security requirements. However, misconfigured group policy objects can have serious consequences. That’s why it’s important to periodically verify that no unauthorized changes have been made. While there are excellent third-party tools available to track and audit group policy changes, PowerShell can also be used to detect changes in group policy settings.
Unfortunately, PowerShell does not have a built-in mechanism specifically designed to track changes in group policy settings. Nonetheless, there is a roundabout way to use PowerShell for this purpose.
To enable PowerShell to detect group policy changes, there are three main steps involved.
First, you need to generate a baseline policy report, which means creating a file containing the current group policy settings. This establishes a known and accurate copy of the existing group policy settings since they are assumed to be correct. Once you have created the baseline policy settings file, it is a good idea to set the file as read-only to prevent accidental changes to its contents.
The second step is to create a separate copy of the group policy settings, which is done at a later point when you want to compare the current group policy settings with the baseline settings recorded in the other file.
The third and final step is to compare the newly created policy settings file with the baseline group policy settings file. This comparison process will highlight any disparities between the two files, indicating any changes that have occurred.
To clarify, the initial two steps of this process involve extracting group policy data and saving it to a file. At this stage, you must decide whether to export the contents of a specific group policy object, such as the Default Domain Policy, or export the resultant policy that encompasses the policy settings applied to a specific user and/or computer. I will demonstrate both techniques, and you can determine which one suits your needs. It’s worth noting that both techniques require you to load the Active Directory module into PowerShell.
How To Create Group Policy Reports
This section provides guidance on exporting group policy object (GPO) settings and exporting a resultant policy using PowerShell cmdlets.
How to export GPO settings
If your goal is to export GPO settings, you can use the Get-GPOReport cmdlet. To achieve this, you need to combine the cmdlet with three command line switches.
- Name switch: The first switch is the Name switch, which specifies the GPO you want to export. Alternatively, you can use the All switch to export the contents of all GPOs. However, I recommend against using the All switch for PowerShell-based comparisons.
- ReportType switch: The second switch is the ReportType switch, which determines the file type for the exported report. For file comparisons, I would recommend creating XML reports, although you can opt for HTML if you prefer.
- Path switch: The third switch is the Path switch. This switch lets you specify the file path and name for the generated file.
To demonstrate the command, suppose you want to create a report called C:\Data\Before.xml based on the Default Domain Policy. Here is an example of the command you would use:
Get-GPOReport -Name “Default Domain Policy” -ReportType XML -Path “C:\Data\Before.xml”
You can see the command and the resulting XML file in Figure 1.
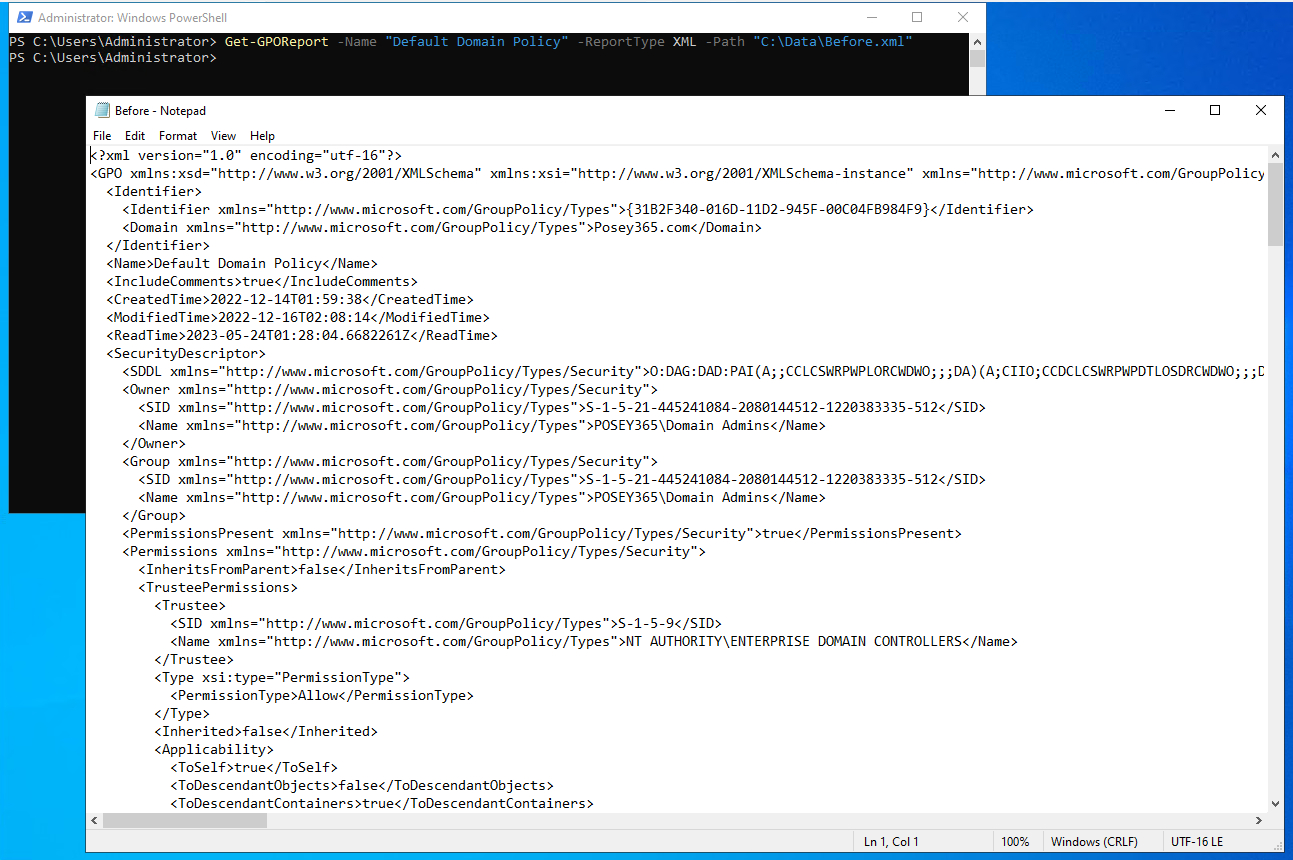
Figure 1. This is how you create a report for a group policy object.
How to export a resultant policy
If you prefer to generate a resultant policy report, you can use the Get-GPResultantSetOfPolicy cmdlet.
To begin, you will need to use the ReportType and Path switches, which function similarly to how they are used with the Get-GPOReport cmdlet. Additionally, you can include the User and/or Computer switches followed by the username or computer name to retrieve the resultant set of policies specific to a user/computer combination.
Here is an example of how this command works:
Get-GPResultantSetOfPolicy -User Administrator -Computer DC -ReportType CML -Path “C:\Data\RSOP.xml”
You can see this command and its corresponding output in Figure 2.
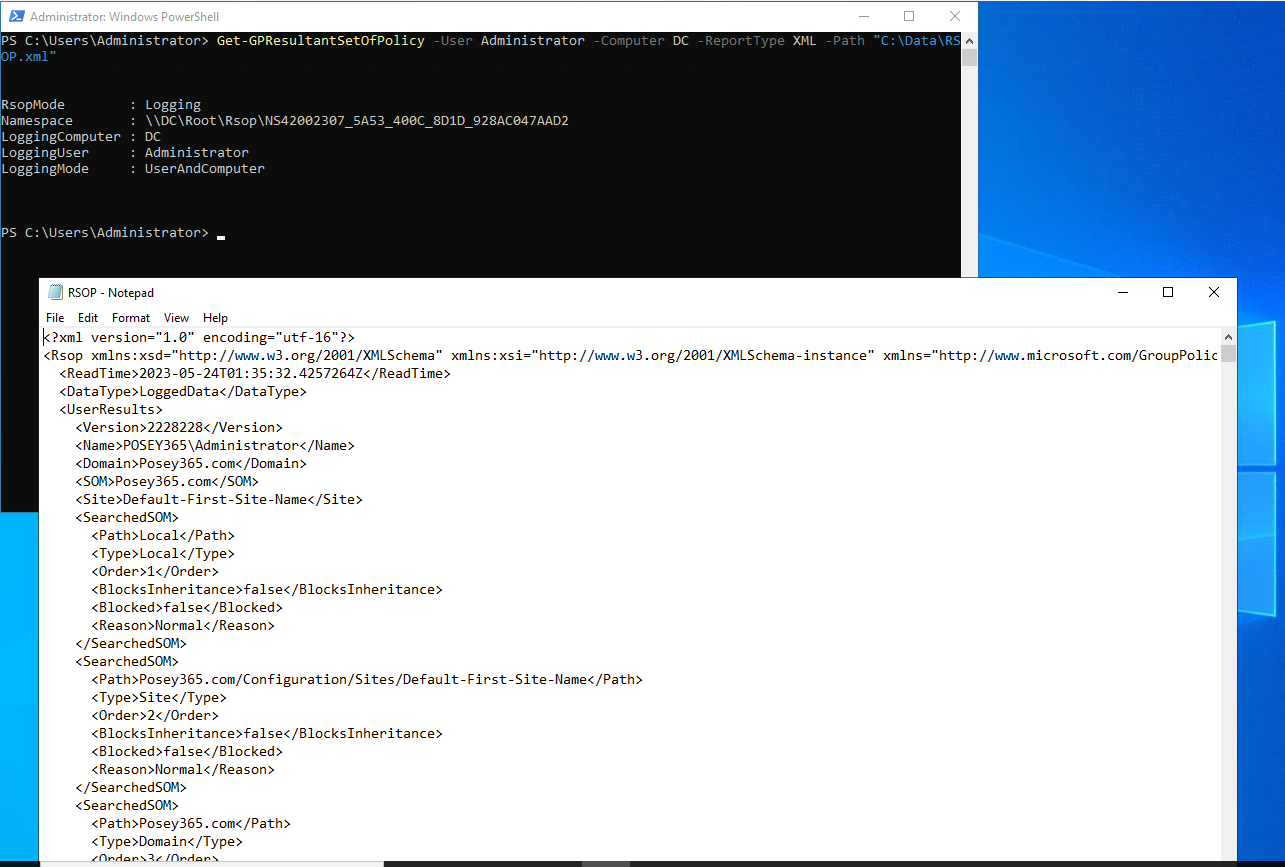
Figure 2. This is how the Get-GPResultantSetOfPolicy cmdlet works.
How To Perform a File Comparison
Having explored two methods for generating group policy reports, let’s now delve into using PowerShell to perform a before-and-after comparison.
My methodology
Before we proceed, I’d like to explain how I prepared the tests that were used for the screen captures in this article. In my lab, I set up a domain controller and made some edits to the Default Domain Policy. Specifically, I navigated to Computer Configuration > Policies > Administrative Templates > System > Filesystem > NTFS and enabled the settings “Do Not Allow Compression on all NTFS Volumes” and “Do Not Allow Encryption on all NTFS Volumes.” Please note that I enabled these settings for the sake of convenience during testing, not because I recommend using them in a production environment. You can see the group policy setting in Figure 3.
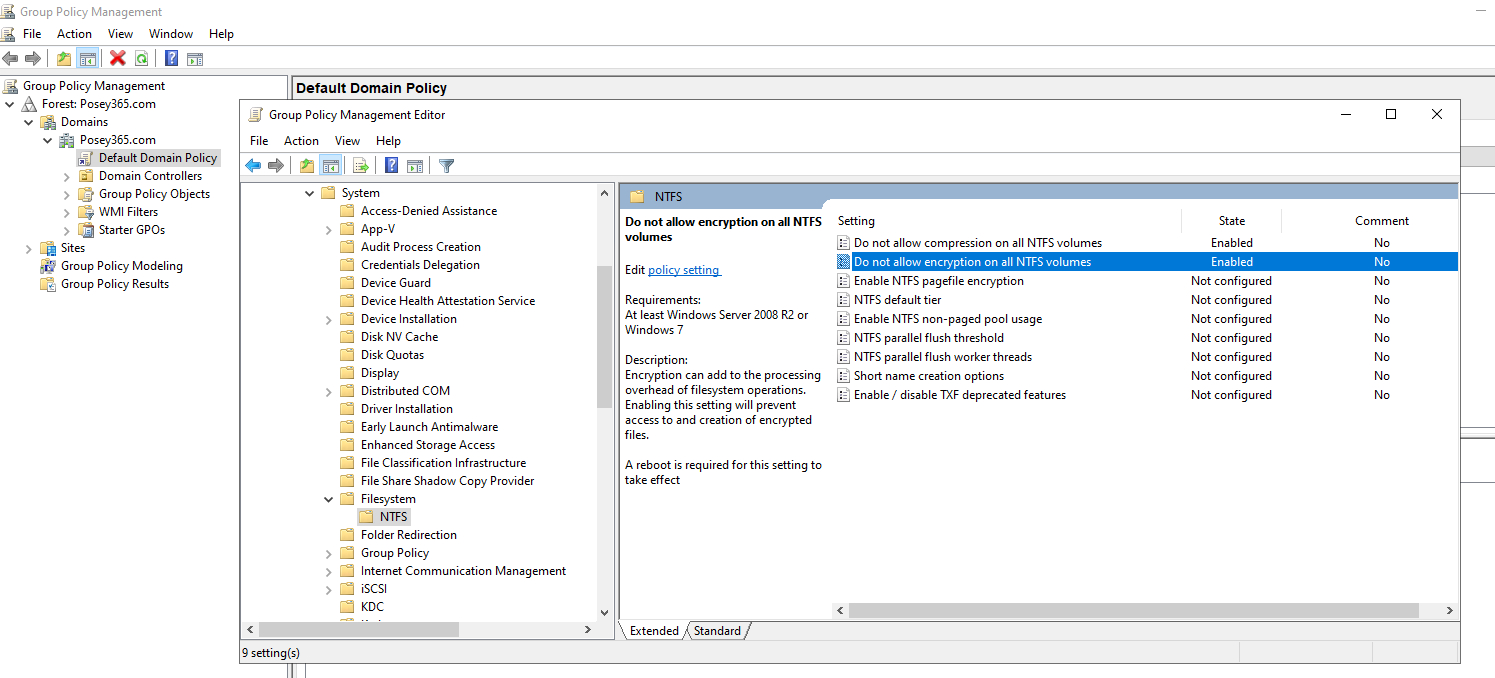
Figure 3. I have enabled two group policy settings within the Default Domain Policy on a lab-based domain controller.
After enabling the aforementioned group policy settings, I used the Get-GPOReport cmdlet to generate a report based on the contents of the Default Domain Policy. I saved this report as Before.xml.
Subsequently, I designated the Before.xml report as read-only. Although this step is not necessary, especially in a lab environment, I wanted to demonstrate how to set a file as read-only. To do so, just use the ATTRIB command followed by the filename and +r. The +r adds the read-only flag to the file, while -r removes it. Figure 4 illustrates the process.
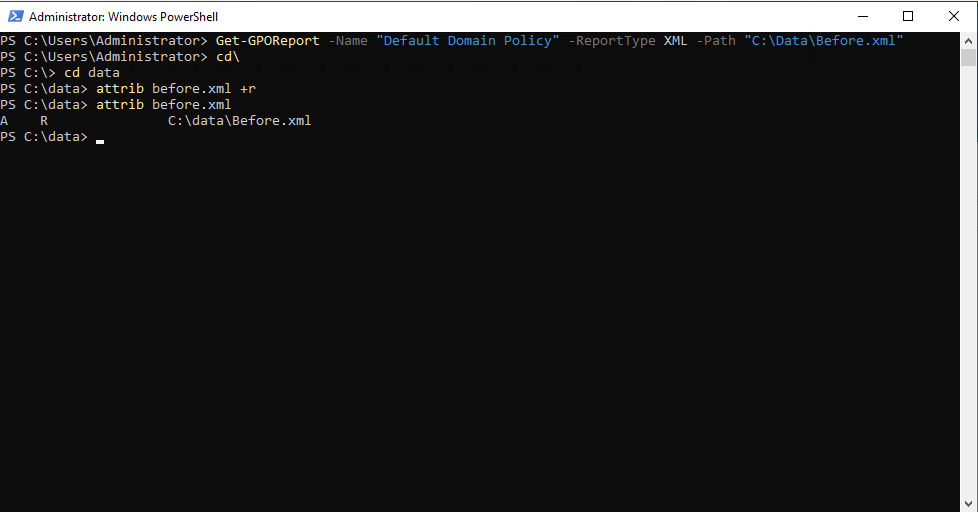
Figure 4. I made my baseline report read-only.
With the baseline report created and read-only, I made a couple of adjustments to the Default Domain Policy. Specifically, I changed the setting for “Do Not Allow Encryption on all NTFS Volumes” to “Not Configured.” Additionally, I enabled the “NTFS Default Tier” setting, as shown in Figure 5. In other words, I modified an existing setting and introduced a new setting. This is essential for the comparison process to detect both types of modifications effectively.
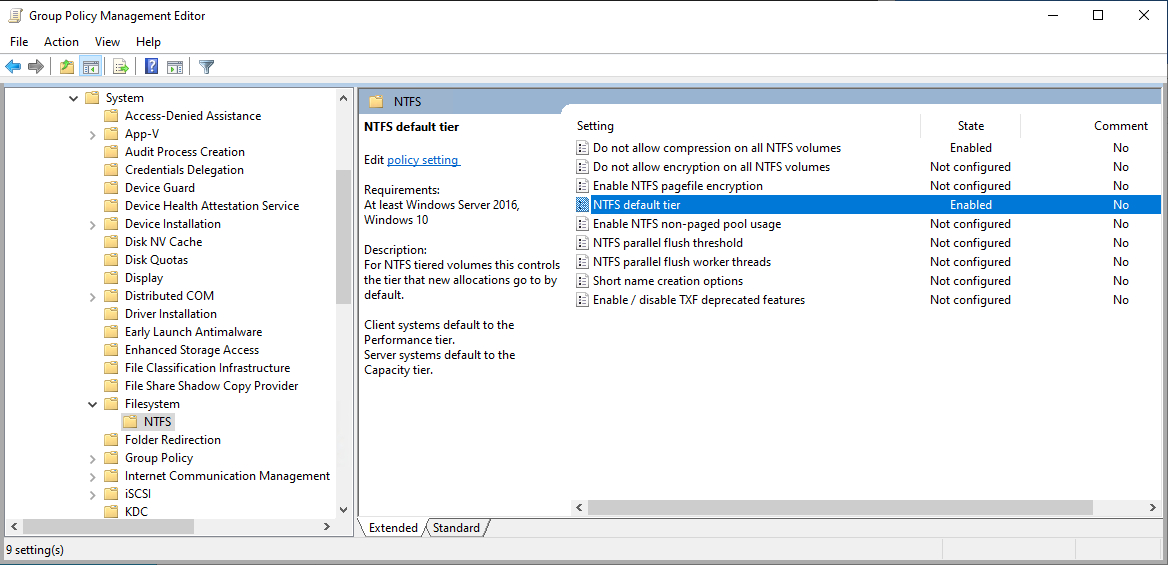
Figure 5. I made two modifications to the Default Domain Policy.
At this point, I executed the Get-GPOReport command again, but this time I generated a report file named After.xml.
Comparing the two report files
The PowerShell cmdlet used to compare two files is Compare-Object. In our case, since we are comparing two XML reports, the baseline report serves as the reference object, while the later-generated report (After.xml) acts as the difference object.
Here is an example of the command:
Compare-Object -ReferenceObject (Get-Content -Path C:\Data\Before.xml) -DifferenceObject (Get-Content -Path C:\Data\After.xml) | Select-Object InputObject, SideIndicator
The Compare-Object cmdlet can be used in several different ways, but as written, the output is configured to suppress everything except for the differences between the two files. When a line is present in the reference object but absent in the difference object, it will be listed with the <= symbol. Conversely, if an item exists in the difference object but not the reference object, the => symbol will be used.
You can see the command’s output in Figure 6.
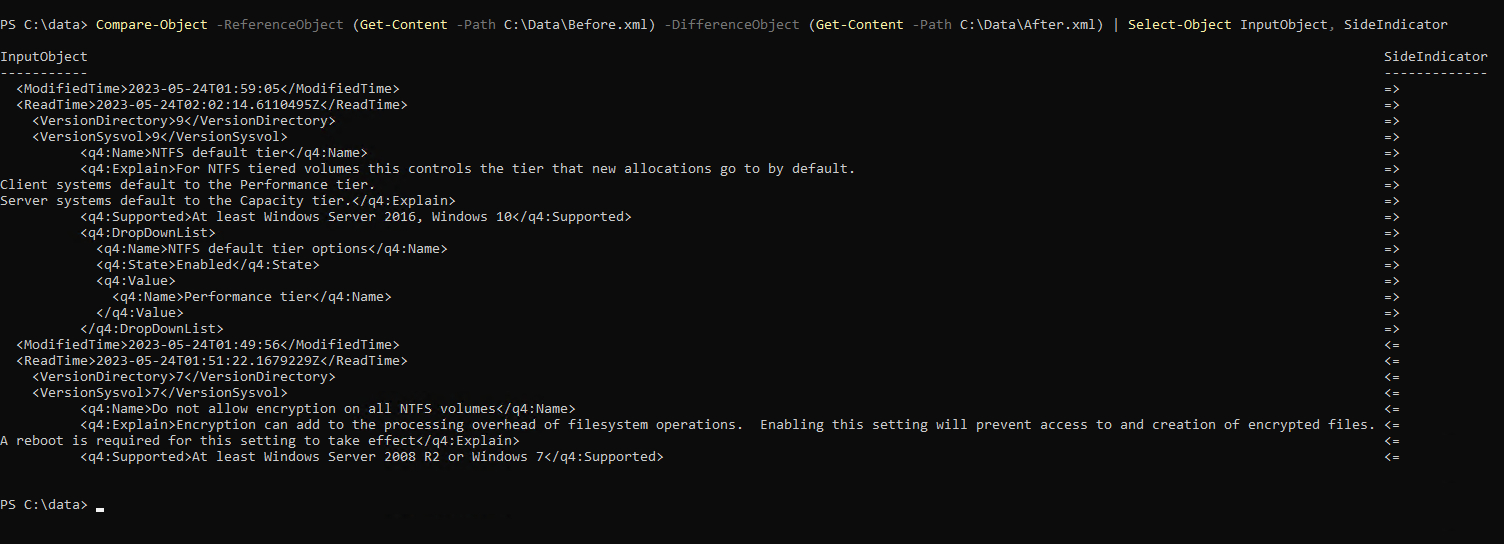
Figure 6. This is the output from the Compare-Object command.
As you examine the output above, you will likely notice two things. Firstly, the output doesn’t present a clean list solely compromised of modified group policy settings. Instead, it provides a comprehensive breakdown of all the differences between the two files. This includes not just policy-setting names but also policy states and even explanatory text.
Secondly, the output initially displays all the items in the difference object (the “after” file) that are absent in the reference object. Only after processing the comparisons with the difference object does the command proceed to list the differences found in the reference object. Nonetheless, the output indicates that two group policy settings have been modified and provides details about the nature of those modifications.
About the author
 Brien Posey is a bestselling technology author, speaker, and 21x Microsoft MVP. In addition to his ongoing work in IT, Posey has trained as a commercial astronaut candidate in preparation to fly on a mission to study polar mesospheric clouds from space..


